Python XlsxWriter – Cell Symbols and Ranges
Python XlsxWriter – Cell Symbols and Ranges
Each worksheet in a workbook is a grid of cells, each of which can store a piece of data—a value or a formula. Each cell in the grid is identified by its row and column number.
In Excel’s standard cell addresses, columns are identified by letters—A, B, C, …, Z, AA, AB, and so on—and rows are numbered starting at 1.
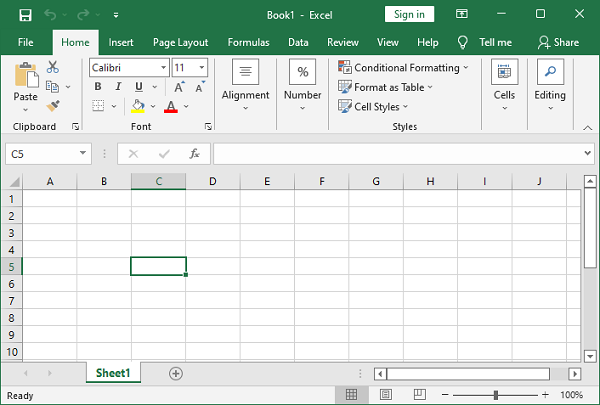
Each cell address is alphanumeric, where the letter corresponds to the column and the number corresponds to the row. For example, the address “C5” refers to the cell in column “C” and row number “5.”

Cell Notation
Standard Excel uses alphanumeric columns and 1-based rows. XlsxWriter supports standard Excel notation (A1 notation) as well as row-column notation, which uses 0-based indexing for both rows and columns.
Example
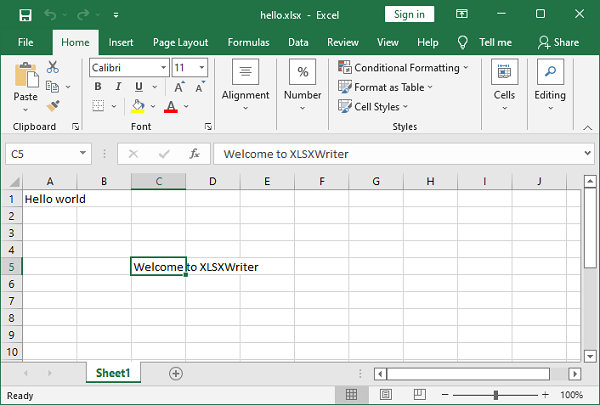
In the following example, the string “Hello world” is written to cell A1 using Excel’s standard cell address, while “Welcome to XLSXWriter” is written to cell C5 using row-column notation.
import xlsxwriter
wb = xlsxwriter.Workbook('hello.xlsx')
ws = wb.add_worksheet()
ws.write('A1', 'Hello world') # A1 notation
ws.write(4,2,"Welcome to XLSXWriter") # Row-column notation
wb.close()
Output
Open with Excel software hello.xlsx file.

Numbered row-column notation is particularly useful when programmatically referencing cells. In the following code, the data in a list must be written to a range of cells in a worksheet. This is achieved using two nested loops, the outer loop representing the row numbers and the inner loop representing the column numbers.
data = [
['Name', 'Physics', 'Chemistry', 'Maths', 'Total'],
['Ravi', 60, 70, 80],
['Kiran', 65, 75, 85],
['Karishma', 55, 65, 75],
]
for row in range(len(data)):
for col in range(len(data[row])):
ws.write(row, col, data[row][col])
The same result can be achieved by using the write_row()() method of the worksheet object as used in the following code –
for row in range(len(data)):
ws.write_row(6+row,0, data[row])
The worksheet object has the add_table() method, which writes data to a range and converts it to an Excel range, displaying the AutoFilter drop-down arrow in the top row.
ws.add_table('G6:J9', {'data': data, 'header_row':True})
Example
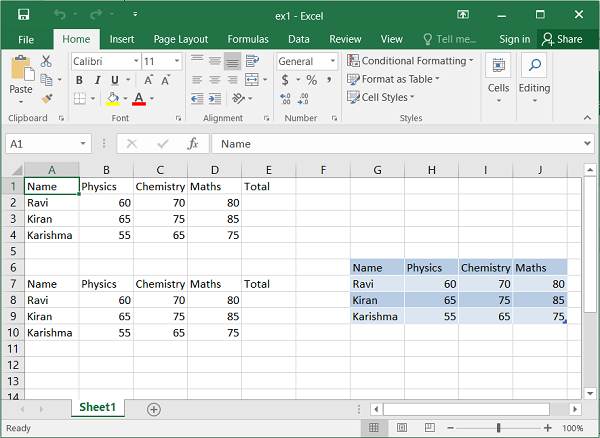
The output of the above three codes can be verified using the following code and is shown in the figure below −
import xlsxwriter

wb = xlsxwriter.Workbook('ex1.xlsx')
ws = wb.add_worksheet()

data = [
['Name', 'Physics', 'Chemistry', 'Maths', 'Total'],
['Ravi', 60, 70, 80],
['Kiran', 65, 75, 85],
['Karishma', 55, 65, 75],
]
for row in range(len(data)):
   for col in range(len(data[row])):
      ws.write(row, col, data[row][col])

for row in range(len(data)):
   ws.write_row(6+row,0, data[row])

ws.add_table('G6:J9', {'data': data, 'header_row':False})

wb.close()
Output
Execute the above procedure and open ex1.xlsx with Excel software.
